
How to view, plan, and schedule your social posts, listing updates, and image uploads using the unified Calendar View interface.
How to Plan, Schedule, and Manage Content Using Calendar View
Managing multi-location marketing campaigns requires a clear view of your publishing timeline.
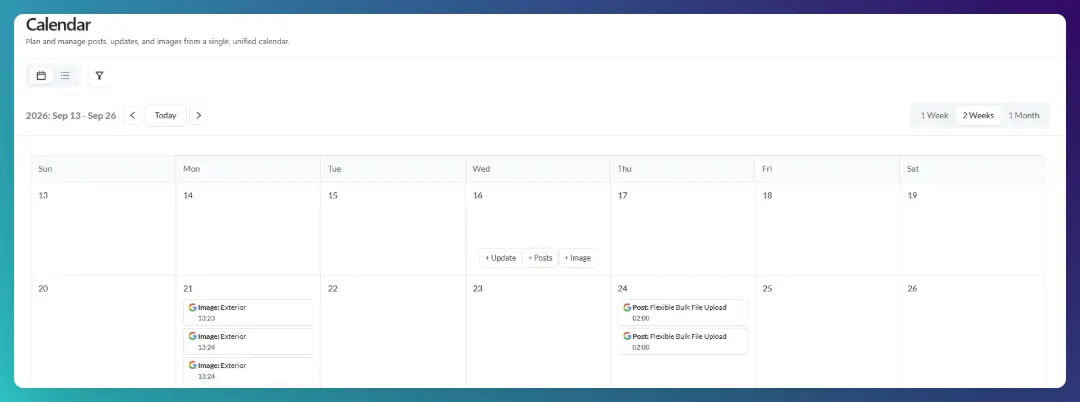
With Calendar View, you no longer have to make do with static list management. You can intuitively schedule, edit, and organize all your listing updates, local posts, and image uploads across every location from a single interactive date grid calendar screen.
By using the Calendar workflow, you gain the following:
- Visual Coverage Tracking: Instantly identify gaps in coverage or overlapping campaigns across specific regions or store locations.
- Comprehensive Workspace: View scheduled posts, platform updates, images, and bulk operations together instead of switching between tools or trackers.
- Flexible Views: Toggle between one-week, two-week, and month views depending on whether you are executing immediate posts or doing long-term planning.
Step-by-Step Instructions
Navigating the Options
Access the Calendar scheduler by clicking the “Calendar” module at the bottom of the left-hand navigation panel.
In the top navigation bar of the calendar, select your preferred view mode: 1 Week, 2 Weeks, or Month; calendar or list view.
If you’re looking for a more platform specific calendar, you can apply filters for Google or Facebook updates, posts, and images. Additional filtering can be done on the right-hand navigation filters.
Posting & Scheduling Content
Using the Calendar, you can either post your update or image immediately or you can schedule it for a later date.
To start the process:
- Hover over the date on the calendar on which you want your content to be published.
- Click directly on the date block you want to post on (current day or future). This will open the Quick-Create menu.
- From here, select the content type you wish to draft:
- Update - listing details
- Post - Google or Facebook posts
- Image - media upload
- Assign the target locations
- Select one, a select few, or all locations on which to push the update.
Pro-Tips
- Switch Back for Details: Use Calendar View for visual layout and high-level campaign planning, then flip back to List View whenever you need to perform detailed filtering, export data, or execute bulk edits.
- Syncing: Any changes or additions made in Calendar View automatically synchronize across List View and vice versa.


