
LocalClarity recommends grouping listings before connecting for best plaltform results
Before you connect to LocalClarity, here is one small trick we recommend to ensure clean presentation of your connected listings. Whether you are a single location business, a mid-to large enterprise or anything in between, having an organized and grouped listings will ensure a smoother connection and greater control in the platform. If you connect your listings without them being grouped, there will be no group value brought in
To begin setting up groups in your Google Business Profile, the first step is to be signed in. You can log into your Google Business Profile Manager Here.
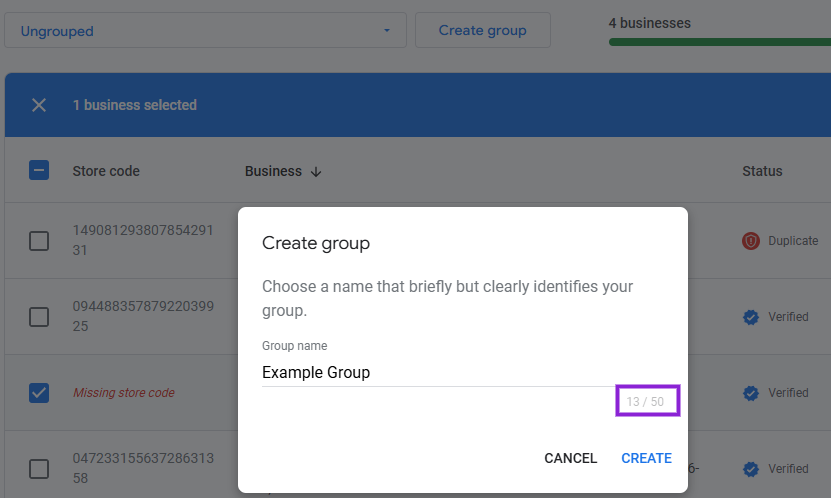
Once you are logged in under your Businesses Tab, select one or more ungrouped locations, click the Create Group button in the center right of the page.

Enter a business group/business account name and click Create (Please note that Google has a 50 character limit for GBP Groups).
You now can follow our Google Business Profile Integration article using the group that you just created. Once connected, you can then edit the connected Group's name to something that is better suited for your profile. This can be done under Settings, within the connected Authorized GBP section of Integrations. From there, click on the three vertical dot icon in the upper right hand corner, and click edit.
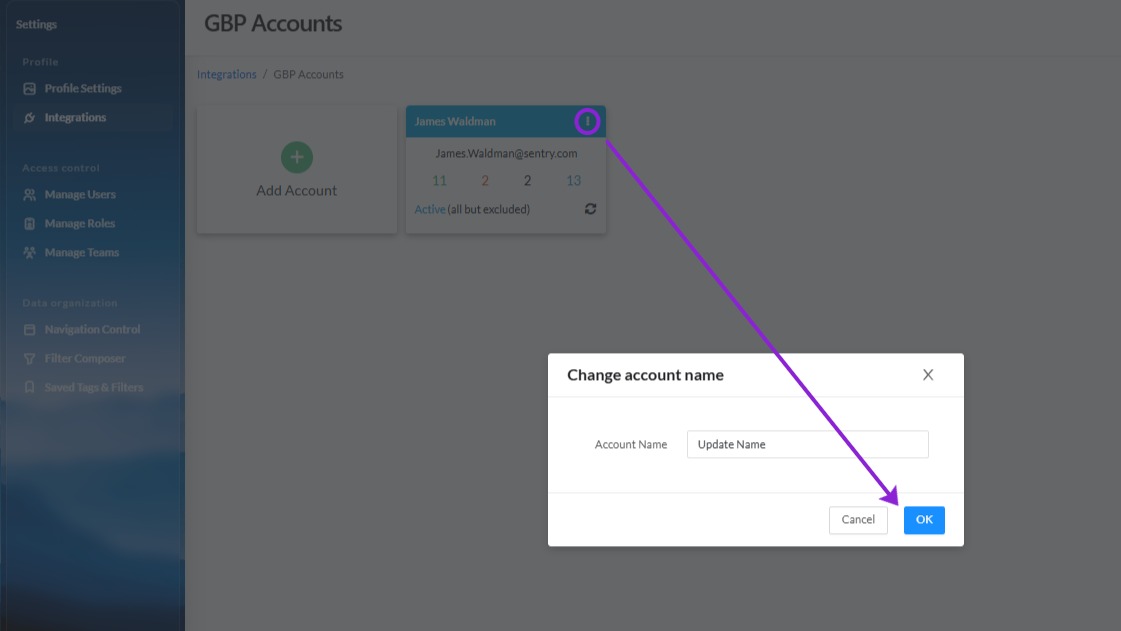
Change to your liking and then Click OK to save your changes.


